
New carpet can dramatically improve the appearance and comfort of your home, adding warmth, softness, and a refreshed look to your living spaces. However, a successful carpet installation involves more than selecting a material and scheduling an appointment. Careful planning, proper preparation, and professional installation techniques all contribute to flooring that performs well over time.
For homeowners in Medford, OR, understanding the installation process can help prevent common problems such as carpet wrinkles, uneven surfaces, and premature wear. From choosing the right carpet to inspecting the finished project, each step plays an important role in protecting your investment.
Whether you’re replacing worn carpeting or updating several rooms, knowing what to expect can make the project easier to manage. For additional information about carpet materials, styles, and performance, explore our Ultimate Guide to Carpet Flooring in Medford, OR.
Introduction to Carpet Installation
Carpet installation is an important part of many home improvement projects, providing an opportunity to improve both the appearance and functionality of your flooring. While selecting the right color and texture is essential, the quality of the installation can have just as much influence on how the carpet looks and performs.
A properly installed carpet should fit securely, maintain a consistent appearance, and withstand everyday household activity. Achieving these results requires accurate measurements, careful subfloor preparation, appropriate padding, and installation methods suited to the carpet’s construction.
For Medford homeowners, selecting materials that match their lifestyle is a useful starting point. Busy family rooms, quiet bedrooms, and formal living spaces may benefit from different carpet fibers and styles depending on how frequently they’re used.
If you’re still comparing flooring options, our article on the Benefits of Carpet Flooring in Medford Homes explains how carpeting contributes to comfort, warmth, sound reduction, and everyday living.
Understanding these considerations before installation helps homeowners make informed decisions about materials, project requirements, and long-term maintenance.
Step 1: Choosing Your Carpet
Choosing the right carpet begins with understanding how the room will be used. Fiber type, construction, density, and stain resistance all influence how well the flooring withstands regular foot traffic. The best carpet for a quiet bedroom may be very different from the material needed in a busy household with children and pets.
Lifestyle is often the most important factor when selecting carpeting. A decorative carpet inset in a formal dining room doesn’t experience the same demands as carpeting installed throughout a home with eight family members and several pets. Choosing a product that matches the household’s activity level helps reduce unnecessary wear.
Another important consideration is how long you expect to keep the flooring. Homeowners preparing to sell within a year may prioritize affordability and appearance, while those planning to remain in their homes for another decade may place greater value on long-term durability.
There are carpet options available for both situations, but their materials, construction, and performance characteristics may differ considerably. Discussing your expectations with a flooring professional can help narrow the choices before making a purchase.
Material Options:
Different carpet fibers offer varying levels of softness, durability, and resistance to everyday stains. Understanding the advantages and limitations of each material can help you select flooring appropriate for your space.
-
Nylon: Nylon carpeting is known for its resilience and ability to recover from repeated compression. Its durability makes it a popular option for hallways, living rooms, and households that experience frequent foot traffic. Many nylon carpets also include stain-resistant treatments that help simplify everyday cleaning.
-
Polyester: Polyester carpet is available in a wide selection of colors and textures, making it appealing for homeowners who prioritize appearance and softness. It generally offers good resistance to certain stains, although its ability to withstand heavy traffic depends on the quality and construction of the carpet. Polyester may be particularly suitable for bedrooms and rooms with moderate activity.
-
Wool: Wool is a natural carpet fiber valued for its luxurious feel, resilience, and comfortable texture. Its natural characteristics provide good performance in many residential settings, although wool typically requires specific cleaning methods and moisture precautions. While wool may appeal to homeowners seeking natural materials, it shouldn’t automatically be considered hypoallergenic.
Carpet fiber technology has advanced considerably, giving homeowners more options for stain resistance, durability, and comfort. Different manufacturers also offer specialized backing materials and construction methods designed for particular applications.
From the Owner: A knowledgeable flooring sales professional can help explain the differences between modern carpet products. Although large home improvement retailers sell carpeting and installation services, specialty flooring professionals often provide more detailed product guidance based on their industry training and experience.
Working with someone who understands carpet construction can help prevent costly mistakes. Rather than focusing solely on color or price, consider how a particular material will perform in your home over time.
Considerations:
In addition to fiber type, several other characteristics affect how carpeting feels and performs after installation.
-
Pile Type: Carpet pile refers to the fibers that form the visible surface of the flooring. Pile height, density, and construction influence softness, durability, and resistance to crushing. Low-pile or densely constructed carpets may work well in high-traffic spaces, while plush styles can provide additional comfort in bedrooms.
-
Color and Pattern: Choose a carpet color that complements your furniture, walls, and existing flooring materials. Neutral colors offer flexibility when decorating, while textured or patterned carpeting may help conceal minor dirt and traffic marks. Consider how natural and artificial lighting will affect the carpet’s appearance throughout the day.
Carpet padding is another important consideration because it supports the flooring and contributes to comfort underfoot. The correct padding thickness and density depend on the selected carpet and the manufacturer’s requirements.
Taking time to compare these characteristics helps ensure that your new carpet meets both your design preferences and practical needs.
Step 2: Preparing the Installation Area
Proper preparation creates the foundation for a successful carpet installation. Before new flooring is installed, the room must be cleared, existing materials removed when necessary, and the subfloor evaluated for potential problems.
Homeowners should begin by removing furniture, decorations, electronics, and other personal belongings from the installation area. Larger furniture may require special arrangements, depending on the installation company’s services and project requirements.
Some carpet installers include furniture moving and old flooring removal in their estimates, while others charge separately or expect homeowners to complete these tasks. Confirming these details before installation day can help prevent scheduling delays and unexpected expenses.
Once the existing carpet and padding are removed, the exposed subfloor should be inspected. Loose boards, protruding fasteners, damaged sections, and uneven surfaces may require repairs before the new materials are installed.
Moisture is another important consideration, particularly when installing carpet over concrete. Any active leaks or excessive subfloor moisture should be addressed before the flooring is covered.
Proper preparation helps prevent noticeable bumps, movement, and other problems that could affect the finished carpet. It also provides an opportunity to resolve existing flooring concerns that might otherwise remain hidden beneath the new installation.
DIY Tip:
Professional carpet installation requires specialized equipment and technical experience, but homeowners can still complete several preparation tasks themselves. Moving furniture, removing old carpeting, and cleaning the subfloor may help reduce labor requirements when these responsibilities are coordinated with the installer.
If you plan to remove the existing carpet, ask your flooring contractor about the proper process and disposal arrangements. Carpet tack strips contain sharp fasteners, and removing flooring can expose damaged materials or other conditions requiring professional attention.
Homeowners may also be able to clean the exposed subfloor and identify minor issues before installation begins. However, repairs involving structural damage, significant unevenness, or moisture intrusion should be evaluated by an appropriate professional.
From the Owner: Subfloor preparation is also the ideal time to fix that irritating floor squeak you’ve been hearing for years. Once the new carpet and padding are installed, accessing the underlying boards becomes much more difficult.
Addressing squeaks and other minor concerns beforehand can help create a quieter, more stable finished floor. A little extra preparation now may prevent the need for additional work later.
Step 3: The Installation Process
Professional carpet installation requires accurate measurements, careful material handling, and techniques appropriate for the selected flooring. Each stage influences how securely the carpet fits and whether it maintains a smooth appearance over time.
An experienced installer should consider more than the room’s dimensions. Carpet direction, seam placement, lighting, subfloor conditions, and manufacturer requirements all affect the installation plan.
Before hiring a contractor, review our guide on What to Look for in a Carpet Installer in Medford, Oregon. It explains how to evaluate experience, communication, installation methods, and workmanship expectations.
Steps Involved:
-
Measuring the Room: Accurate measurements help determine the amount of carpet required while accounting for room shape, closets, doorways, and other features. Installers must also consider carpet roll widths, pile direction, seam locations, and how natural light enters the space. These factors influence material requirements and the finished appearance of the flooring.
-
Cutting the Carpet: After the installation layout is planned, the carpet is cut to fit the room’s dimensions. Installers typically leave additional material along walls and other edges so the carpet can be properly positioned and trimmed. Careful cutting also helps accommodate corners, doorways, and areas where multiple carpet sections must be joined.
-
Seaming the Carpet: Larger rooms often require seams where two sections of carpeting meet. Proper seam construction involves aligning the carpet’s pile direction, preparing the edges, and using the materials and techniques recommended by the manufacturer. A seam may remain somewhat visible depending on the carpet and lighting, but it should be securely constructed to withstand normal use.
-
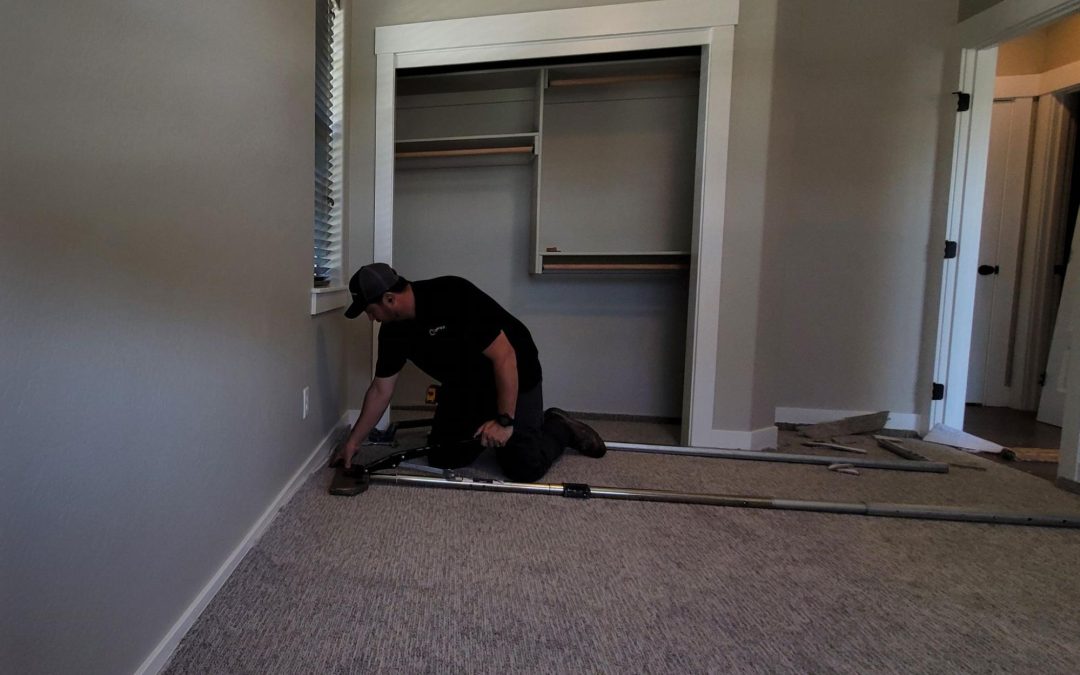
Installing the Carpet: For traditional stretch-in installations, carpet is positioned over the appropriate padding and secured around the room’s perimeter using tack strips. A professional installer uses a power stretcher to apply controlled tension across the flooring, helping achieve a smooth fit and reduce the risk of wrinkles developing later.
The stretching process deserves particular attention because improper techniques can contribute to premature carpet failure. Simply pulling the carpet into position with inadequate equipment may create a finished appearance that looks acceptable initially but develops ripples after regular use.
Professional power stretchers typically use adjustable metal tubes and a padded plate positioned against an opposing wall. This equipment allows the installer to apply the tension needed to secure the carpet according to applicable standards and manufacturer requirements.
Some alternative stretching devices penetrate the carpet backing or anchor into the subfloor. These methods may not provide the required stretch and can potentially damage the flooring materials.
From the Owner: Carpet stretching is one of the most important parts of the installation process. Certain shortcuts may produce a finished floor that looks good initially, but wrinkles can appear months or years later when the carpet begins to loosen.
The Carpet and Rug Institute’s residential installation standard, CRI 105, requires power stretching for applicable stretch-in installations. It also identifies penetrating stretching devices as unacceptable substitutes for an appropriate power stretcher.
Failing to follow required installation procedures may affect manufacturer warranty coverage if problems develop. This is one reason homeowners should consider an installer’s experience and workmanship rather than selecting a contractor based on price alone.
Ask potential installers which equipment they use and whether their methods meet the carpet manufacturer’s specifications. Clear answers can help you evaluate the quality of the installation before work begins.
Step 4: Post-Installation Care
Once your new carpet is installed, regular maintenance helps preserve its appearance and performance. Even durable carpeting can develop premature wear when dirt, moisture, and other debris accumulate within the fibers.
The first step is understanding the manufacturer’s cleaning recommendations. Different carpet materials have specific requirements for vacuum equipment, cleaning products, and professional maintenance schedules.
Keeping a record of your carpet purchase, installation date, and warranty information can also be useful. Some manufacturers require particular maintenance practices or professional cleaning documentation to maintain warranty coverage.
Maintenance Tips:
-
Use Doormats to Minimize Dirt: Place durable mats outside and inside exterior doors to reduce the amount of soil, sand, and moisture tracked onto carpeting. Removing abrasive debris before it reaches the flooring helps limit unnecessary fiber wear. Clean entry mats regularly so they continue collecting dirt effectively.
-
Rotate Furniture to Distribute Wear Evenly: Rearranging movable furniture periodically can help change foot traffic patterns and prevent excessive wear in the same locations. Use appropriate furniture protectors beneath heavy pieces to reduce concentrated pressure on carpet fibers. Always lift furniture rather than dragging it across the floor.
-
Schedule Professional Cleaning Annually: Periodic professional cleaning helps remove embedded soil that household vacuuming may leave behind. An annual schedule can be appropriate for many busy households, although the ideal frequency depends on carpet material, foot traffic, and manufacturer requirements. Some homes may need more frequent attention, while lightly used carpeting may require less.
Regular vacuuming and prompt stain removal should also be part of your maintenance routine. Choose equipment compatible with your carpet construction and avoid excessive moisture when treating spills.
Proper maintenance doesn’t need to be complicated. Consistent care, appropriate cleaning products, and attention to developing problems can help your carpeting maintain its appearance for years.
Step 5: Inspect Your New Carpet and Review Warranty Coverage
A final inspection gives homeowners an opportunity to evaluate the completed installation before the project is considered finished. While the carpet may look attractive at first glance, checking a few important details can help identify concerns that should be addressed immediately.
Walk through the installed areas with your flooring contractor and inspect the surface from different angles. Pay attention to seams, transitions, edges, and locations where the carpet meets other flooring materials.
The carpet should appear smooth and securely positioned without noticeable wrinkles or loose areas. Some seams may be visible depending on the material and lighting, but they shouldn’t have obvious gaps or poorly secured edges.
Check that transition strips are properly installed and that doors operate without catching or dragging against the new carpeting. If existing flooring issues were identified during preparation, confirm that those concerns were addressed as agreed.
Before the installer leaves, ask about the manufacturer’s product warranty and any separate workmanship warranty provided by the installation company. These warranties may cover different types of problems, so understanding the terms can help prevent confusion later.
Quick Tip: Take photographs of the completed installation and keep copies of your invoice, product information, and warranty documents. These records may be useful if questions about workmanship or carpet performance arise in the future.
Ask the installer what to do if wrinkles, loose seams, or other installation concerns develop after the project is complete. Knowing who to contact and how warranty requests are handled provides additional peace of mind.
Completing this final walkthrough helps ensure that the finished flooring meets your expectations and that you understand how to maintain it properly.
Conclusion
Carpet installation in Medford, OR, involves several important decisions, beginning with material selection and continuing through preparation, installation, and long-term care. Each step contributes to the appearance, comfort, and durability of your finished flooring.
Choosing a carpet suited to your lifestyle is essential, but installation quality is equally important. Accurate measurements, proper subfloor preparation, carefully constructed seams, and professional stretching techniques all help prevent avoidable problems.
Ultimately, two factors have a major influence on the success of your carpet project. The first is selecting carpeting appropriate for your household’s needs and expected lifespan. The second is ensuring that the flooring is installed according to the manufacturer’s requirements and applicable Carpet and Rug Institute installation standards.
Working with experienced professionals can make these decisions easier while helping protect your investment. Clear communication, dependable workmanship, and a thorough final inspection all contribute to a successful project.
At Oregon Floor Works, we provide professional carpet installation services for homeowners in Medford and throughout Jackson County. Whether you’re replacing carpeting in one room or planning a larger flooring renovation, our team can help you explore materials and installation options suited to your home.
Learn more about our carpet flooring services or contact Oregon Floor Works to discuss your upcoming project.
Resources
For additional information about professional carpet installation requirements, visit the Carpet and Rug Institute’s Installation Standards.
The Carpet and Rug Institute provides industry-supported installation guidelines, including CRI 105 for residential carpeting and CRI 104 for commercial applications. These standards address important topics such as subfloor preparation, seam construction, carpet stretching, and installation methods.
Reviewing these resources can help homeowners understand what proper installation involves and what questions to ask before hiring a flooring contractor.